Across Bengaluru, apartments have been popping up like mushrooms over the years. This poses several challenges to the city, including waste management. Though BBMP (Bruhat Bengaluru Mahanagara Palike) has introduced many rules that require apartments to manage their own waste, not all apartments follow these.
Some apartments face practical difficulties such as lack of space or the heavy investment needed to install a composting unit. The poor management of waste affects not just apartment residents, but all citizens.
But the solution could be quite simple. Back in the olden days, people used to segregate and compost their wet waste – mainly waste from the kitchen – in their own backyard. Even today, in most villages, people create their own waste dump to recycle the waste they generate.
Gowru Chinnappa, who lives in an independent house in Sanjaynagar, shows this is possible even in our city homes. She has not given away any wet waste to pourakarmikas in the last 10 years or so. Instead, she uses the waste to grow vegetables and fruits in her own garden.
Gowru says, “Wet waste is green gold according to me. We have to stop viewing it as waste, and think of it as a resource, to generate our own valuable compost. In fact, plantains thrive on the garbage heap in my backyard.”
But how do you deal with waste if you live in an apartment and don’t have a backyard? This is not rocket science either. According to Gowru, all you need is a waste bucket to which you fit a tap and drill a few holes all over. This is an easy and cheap DIY option in lieu of compost khambas available in the market.
Here are the steps to make your own compost bucket:
- First, take a plastic bucket, and drill a hole just an inch above its bottom. Fix two washers here to install a tap.
- Drill holes all over the bucket
- Put a few broken tiles at the bottom of the bucket; then pile some pieces of coconut shell over it.
- Put a layer of wet waste above this. Then add a layer of dry leaves, almost double the quantity of the wet waste layer. Keep adding wet waste and dry waste in layers regularly.
- Keep newly-added layers intact for a few days, and then stir it once in a while.
- The liquid leaching from the waste can be drawn out through the tap occasionally. This liquid is a good compost tea for your plants.
- Continue filling the bucket until it becomes full. Then cover the top of the bucket with a hardboard.
- The mixture would turn into compost in almost three months. You can then use it in your home garden!
To avoid any foul smell, you can add more dry leaves to the bucket. As the first bucket fills up and turns to manure, you can start depositing waste in a second bucket, and vice versa. Another option is, once the first bucket becomes half-full, transfer its contents to a second bucket and have it turn to compost. In the meantime, start filling the first bucket over again. You can try variations of these methods, based on your observations.
Now that you have good manure that is free from chemicals, you can easily start growing your favourite vegetable or flower.
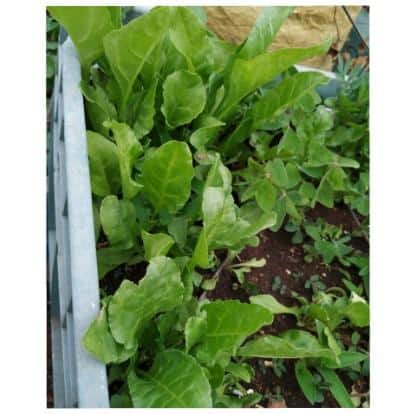
You can use the compost to grow your own fruits and vegetables. Pic: Abhijna N C
Eating food grown by your own hands, in your own garden, is a tremendous joy beyond description. You can start a patch of garden on the terrace or balcony of your apartment. Gardening relaxes us, and leaves a lasting, deep impact on our health; it reduces symptoms of anxiety and depression.
With the DIY compost bucket, each of us can contribute to a healthy environment and society by managing our own waste.
Brilliant and simple. Would a few worms help the process?